


The day I nearly sunk my Sea-doo due to the hull getting full of water after a flip was the day I decided to do a Bilge Pump Install in my Sea-doo. The local Sea doo dealer wanted a heap of dollars to install an automatic bilge pump so I thought I would install one myself.
The Sea-doo rollover (flip) was a very simple event that really shouldn’t have happened. Basically, we were pulling our Airhead 3 person tube and we slowed down to rescue a child that had fallen off the tube.

My observer on the back leaned over at the same time another boat’s wake rolled into us and the whole ski just tipped and rolled due to the slow no power turn. Having to turn over the Sea-Doo was easy enough but the hull was full of water so we returned to the bank to drain the hull.
Luckily that it started back up otherwise we would have some Jetski fault finding to do. Hence my mission is to install an automatic bilge pump into a Sea-Doo using aftermarket parts cheaply so fewer problems to worry about.
Table of Contents
Sea-Doo Bilge Pump Install Simple DIY – Rule 500, 750, 1100 GPG
This Jetski DIY Bilge Pump Install project can be done in a few hours. I chose the rule 500A bilge pump but you can use a higher GPH pump if you feel the need. The following items will be required.
- Automatic Bilge pump 1100 GPH
- Right-angle 3/4 through-hull fitting, Bilge Pump connection
- 2 Core cable to supply power to the pump. 12 Volts
- Weatherproof
2-way switch, a 3 terminal/way switch is better. - Terminal Grease, and silicone
- Heat shrink and some cable ties.
- Dual Lock Velcro
- Hole saw sized for your through-hull fitting
- Crimp lugs for battery terminals
- In-line fuse 3 amp
- Masking Tape and drill.
- Stainless steel hose clamps x2
- Heat gun, for the heat shrink
Automatic Bilge Pump Sea-doo 500/1100 GPH.
Key Benefits & Features:
- All-in-one bilge pump and auto-switch. There is no float switch this is an electronic water-sensing pump.
- The pump turns on when the water rises and shuts off when water is removed.
- Snap-off strainer for easy installation and cleaning.
- 1-1/8 inch discharge outlet.
- 3-year warranty.
- Features a solid-state water sensing technology. No moving parts.
- Auto control.
- Manual Control.
- Neutral.
Rule-
Mate fully automatic submersible bilge pump. Innovative design incorporates the bilge pump and float switch in a single housing.
The float switch is an electronic type so there shouldn’t be any false starts of the pump as the Sea-doo bounces around. It’s a good idea to test-run your pump in a bucket of water before installing it. There are 3 wires for the switch.
When water enters the hull and is detected by the bilge. It needs to reach a certain height (2-3/4 inches) a sensor turns the pump on. After the water is pumped out another sensor shuts the pump off. So mount this pump in the lowest part of your boat or Jet-Ski.
Rule pumps have been designing and building bilge pumps for over 50-years. These sump pumps are the first choice by boat owners and fishermen all over the world.
Mounting Bilge Pump onto Sea-doo
 You need to mount the bilge pump a the lowest part of your hull. The outlet can be on any side as long as it is above the water line.
I used 3m dual lock tape on the bottom of the rule pump water inlet filter. This enabled me to stick the pump onto the hull bottom and easily remove it if the pump fails or other 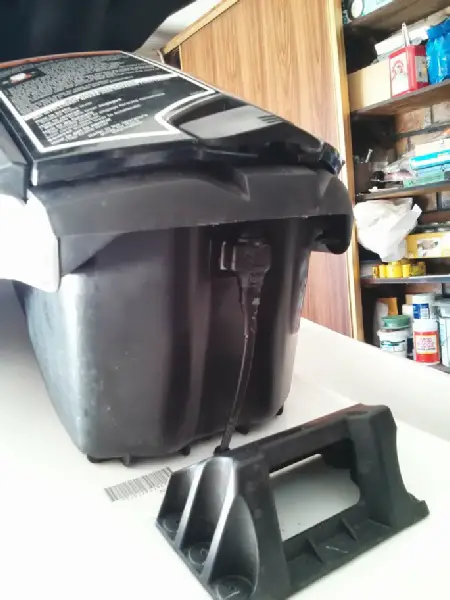 mechanical work needs to be done.
This tape is absolutely fantastic it’s so strong and really locks the pump down. Just clean the hull with methylated spirits first to get a good bond on the tape. After 2 years the pumps are still stuck on good.
You will need to run your 2-core cable up to the battery and terminate it with your in-line fuse on the active. A 3 amps fuse is fine as the pump only pulls 2 amps. You will need a larger fuse if you use one of the higher GPH pumps like the 750 or 1100 GPH pumps. These will draw closer to 4 amps.
The other option is to run only the active wire up to the battery and run the neutral or earth from the pump to a screw on the engine for the earth. Don’t connect the fuse yet.
Mounting Override Switch Sea-doo
Next is to mount the override switch, I put mine just below the glove box latch. I found this a great spot as it is easily accessible and well-hidden at the same time, a small hole will have to be drilled to enable the cable to pass through.
The 3-way auto-manual switch is also mounted with dual lock tape, the heavy-duty stuff.
To stop water from getting into the switch I have used some Dow Corning® 111 Valve Lubricant and Sealant this stuff is great as it seals against ingress of moisture and doesn’t attach plastic or rubber-like some other sealants.
So the Rule pump has 3 wires 2 active and 1 neutral. One of the wires is your auto control and the other one is the manual control. Don’t mix them up. Depending on the type of switch you have, usually the active wire will go to the center switch terminal, and the 2 pump wires will be wired into the other 2 spots on the switch. This way you can have auto and manual control.
Drilling Through Jetski Hull Body Fibreglass
This was my last step to make sure that my hose can be connected in the correct position without being kinked.
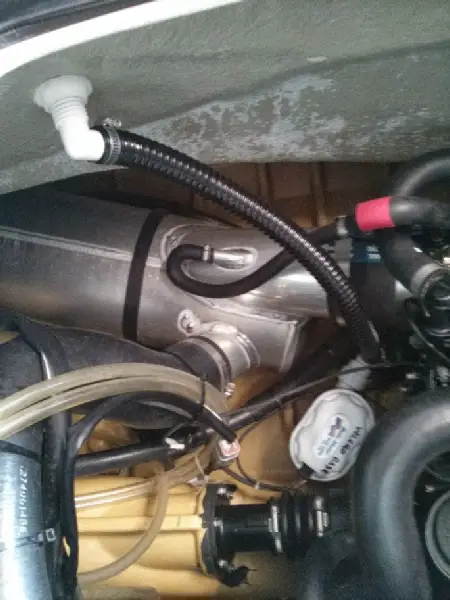 Next, tape the front side and the back side with masking tape, this stops your paint from chipping when drilling through the fiberglass with a hole saw. From memory, I used a 20mm hole saw, but just match it to the size of the through-hull fitting.
Take your time and drill slow. Once through clean up any sharp edges with some fine sandpaper. Put a bit of silicone on the through-hull fitting and insert it into the hole. Wind up the nut on the back and attach the hose to the through-hull fitting and the Rule pump. Thanks to RobWCanada for showing how it’s done
Connect the fuse and test run the manual switch, it should start-up. Don’t run it for too long as it’s not good for the pump to run dry. Auto will run when the water level rises. WE DON’T WANT THAT EVER…..It means a problem.
Cable tie every cable down so it doesn’t bounce around.
Have fun with the new addition of your Bilge Pump Install. This procedure can be the same for a boat, all you may need is a longer water outlet hose.
Do Sea-doos have bilge pumps?
Some Sea-doo models come out with a bilge pump already fitted otherwise it will be an optional extra.
In my opinion, a bilge pump should be installed standard on every Jet ski. If you ever flip your jet-ski or have a cooling hose come off it could save your PWC from sinking.
Now go ahead and do your yearly service oil change and coolant flush on the Sea-Doo.
Let me know in the comments below how you installed your bilge pump.

I am a qualified Industrial Electrician for the past 20 years and I love to share my knowledge on home repair and maintenance jobs.
I love fast toys like Motorcycles, Cars, Jetskis, Boats, and Computers so writing about them is easy. Working on them is fun.
To keeps costs down I do all my own mods, repairs, and servicing. These skills I want to share with everyone. DIY is a skill everyone can learn.


